Ever wonder how you can keep tabs on your Raspberry Pi, especially when it's tucked away in some remote spot, maybe even running an interesting Internet of Things (IoT) project? Well, getting that connection just right can sometimes feel a bit like trying to find a secret handshake, you know? This guide is all about helping you figure out how to securely reach your little computer from anywhere, focusing on the essential steps for an easy setup and how to get the right tools. It's really about making your digital life a whole lot simpler.
You see, when you're working with tiny computers like the Raspberry Pi, especially for things like home automation or environmental monitoring, you often need to check in on them without physically being there. That's where SSH comes in, and it's a pretty big deal. It lets you send commands, move files around, and basically manage your Pi from your regular computer, no matter where you are. So, you can update your project or fix something without having to unplug and replug anything, which is rather handy.
This whole idea of secure remote access is actually a core part of how many digital systems work today, from big data centers to your very own smart home devices. We'll walk through what SSH is, how to get your Raspberry Pi ready, and then how to download the necessary software to make that secure connection happen. It's not nearly as complicated as it might seem, and by the end, you'll have a good grasp of how to keep your IoT projects running smoothly and safely, perhaps even more so than you thought possible.
- Jessy Dubai
- Jill Ireland
- Brigitte Macron Young Pictures
- Pineapplebrat Leak
- Securely Connect Remoteiot P2p Ssh Download Android
Table of Contents
- Why SSH Matters for Your IoT Raspberry Pi
- Getting Your Raspberry Pi Ready for Remote Access
- Downloading SSH Clients: Your Connection Tools
- Connecting Securely: Your First SSH Session
- Troubleshooting Common SSH Hiccups
- Frequently Asked Questions
- Wrapping Things Up
Why SSH Matters for Your IoT Raspberry Pi
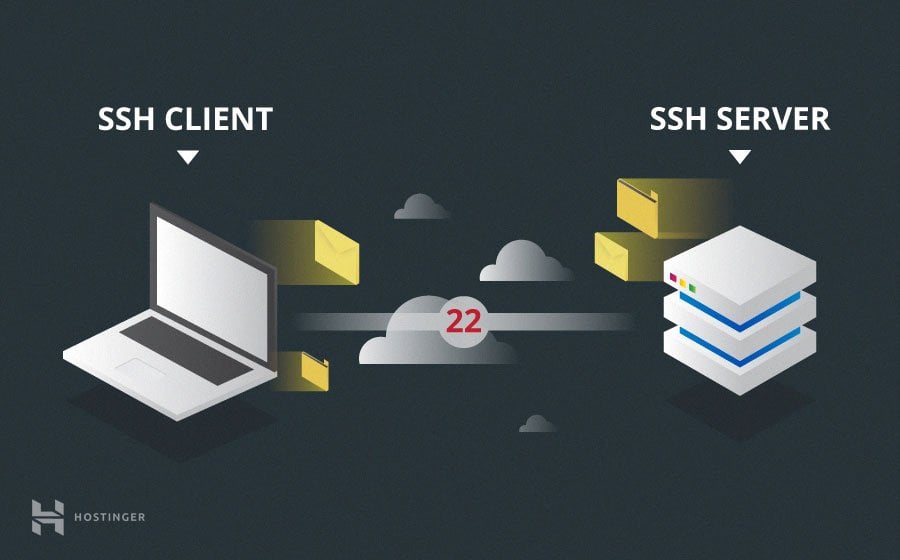
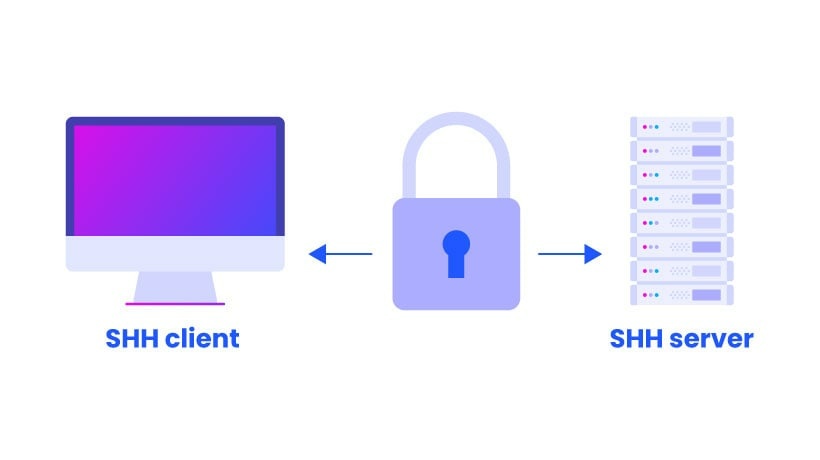
When you hear about SSH, it basically stands for "Secure Shell," and it's a way to connect to another computer over a network in a very safe manner. Think of it like a secure, encrypted tunnel that lets you send information back and forth without worrying about someone listening in. This is incredibly important for your Raspberry Pi, especially if it's doing something like controlling smart lights or collecting temperature data in your garden, you know? You want that connection to be private.
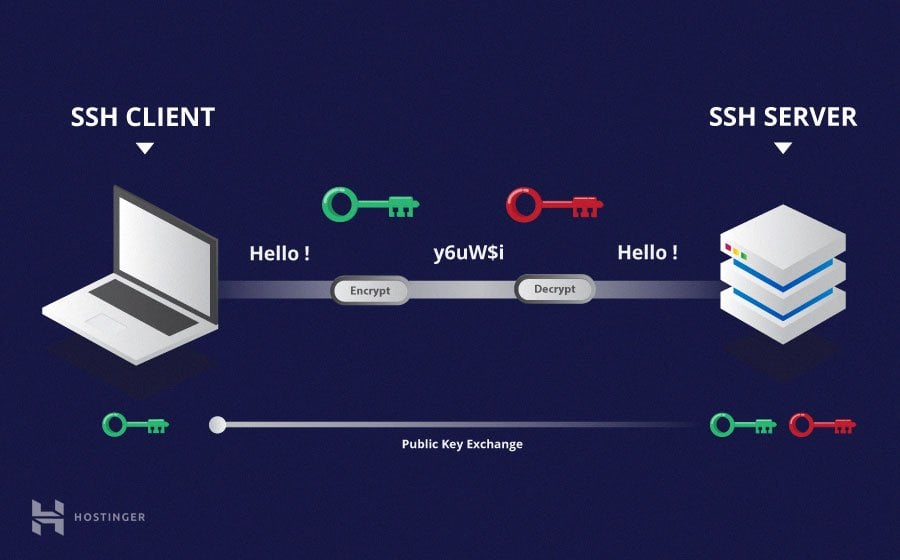
My text mentions that SSH is a "cryptographic network protocol" that helps "network services to operate securely over an unsecured network." That's a pretty neat way to put it, as a matter of fact. It means even if you're connecting from a coffee shop's Wi-Fi, your commands and data are scrambled so no one can easily snoop on them. OpenSSH, which is a common program for this, "encrypts all traffic to eliminate eavesdropping, connection hijacking, and other attacks," which is a really good thing for keeping your IoT setup safe.
For your Raspberry Pi, which is often running without a screen or keyboard, SSH is practically essential. It allows you to "log into a remote machine and for executing commands on a remote machine," as my text points out. This means you can update software, check sensor readings, or restart a service on your Pi from your laptop, wherever you are. It's how you manage your IoT devices without having to physically touch them, which is a huge convenience, honestly.
Getting Your Raspberry Pi Ready for Remote Access
Before you can even think about connecting to your Raspberry Pi from afar, you need to make sure it's set up to allow those connections. This usually involves enabling the SSH service on the Pi itself. If you've just put a fresh operating system like Raspberry Pi OS onto your SD card, SSH might not be turned on by default, so that's something to check. It's a pretty straightforward process, actually.
You can enable SSH in a few different ways. One common method is to use the Raspberry Pi Configuration tool, which you can find under "Preferences" in the graphical desktop environment. There's a tab called "Interfaces," and you just tick the box next to SSH. Another way, if you're starting headless, is to create an empty file named `ssh` (no extension) in the boot partition of your SD card before you even put it into the Pi. When the Pi starts up, it sees that file and automatically turns on SSH, which is rather clever.
Once SSH is enabled, you'll also need to know your Raspberry Pi's IP address on your local network. This is like its street address. You can usually find this by typing `hostname -I` into the Pi's terminal if you have a screen connected, or by checking your router's connected devices list. Knowing this address is key because it's what you'll use to tell your computer where to connect. It's a bit like knowing the phone number before you make a call, you know?
Downloading SSH Clients: Your Connection Tools
To talk to your Raspberry Pi using SSH, your main computer needs a special program called an SSH client. This client is what sends your commands through that secure tunnel we talked about. The good news is that these tools are widely available and usually free to download. The one you pick often depends on what kind of computer you're using, so that's a thing to consider.
PuTTY for Windows Users
If you're on a Windows machine, PuTTY is probably the most popular choice for an SSH client, and it's been around for a long time. It's a simple, yet very effective tool for making those remote connections. You can easily find it with a quick search online, and it's a small download, so it won't take up much space on your computer, which is nice.
One thing my text mentions is that "A putty session left idle will disconnect at a time determined by the host server." This is a common experience, you know, where your connection just drops if you're not actively typing. My text also says this "causes putty to send null ssh packets to the remote." This is actually a feature you can enable in PuTTY's settings, called "Keepalives," which sends tiny, empty packets periodically to keep the connection alive, even when you're not doing anything. It's a pretty useful trick to avoid those annoying disconnections, honestly.
Once you've downloaded PuTTY, you just open it up, type in your Raspberry Pi's IP address, make sure the port is set to 22 (which is the standard SSH port), and then click "Open." You'll then be prompted for your username and password for the Pi, and just like that, you're in! It's a fairly straightforward process, and very intuitive for most users.
OpenSSH for Linux and macOS
For those of you using Linux or macOS, you're in luck because an SSH client, typically OpenSSH, is usually already built right into your operating system. My text points out that "Openssh is the premier connectivity tool for remote login with the ssh protocol," and that's absolutely true. You don't usually need to "download" anything extra; it's just there, ready to go in your terminal application. This makes things a bit simpler, to be honest.
To connect, you just open your terminal and type a command like `ssh pi@192.168.1.100` (replacing `pi` with your Pi's username and `192.168.1.100` with its actual IP address). You'll then be asked for your password. The first time you connect to a new Pi, your computer might ask you to confirm the host's identity, which is a security measure. My text mentions issues like "The ecdsa host key for 'myserver' differs from the key for the," which means your computer noticed a change in the server's unique identifier. This is usually just a warning to make sure you're connecting to the right machine and not some imposter, so it's good to pay attention.
This command-line approach is really powerful, and once you get used to it, it feels very efficient. You can automate tasks, run scripts, and do pretty much anything you could do if you were sitting right in front of your Raspberry Pi. It's a very flexible way to work, and many people prefer it for serious IoT projects, you know?
Connecting Securely: Your First SSH Session
So, you've got your Raspberry Pi ready and your SSH client downloaded. Now comes the exciting part: making that first secure connection. It's a moment of truth, in a way. Whether you're using PuTTY or the terminal, the basic idea is the same: you tell your client the username for the Pi and its IP address, and then you provide the password. It's like knocking on a door and giving the secret password to get in.
When you type in your password, you won't see any characters appear on the screen, which can feel a bit odd at first. This is a security feature to prevent anyone looking over your shoulder from guessing your password length. Just type it carefully and press Enter. If everything goes well, you'll see a command prompt that looks just like what you'd see if you were typing directly on your Raspberry Pi. You're in! You can then start issuing commands to your Pi, which is pretty cool.
Handling Annoying Connection Drops
As my text points out, "A putty session left idle will disconnect at a time determined by the host server." This is a pretty common annoyance, especially if you're just monitoring something and not constantly typing. It happens because networks often have idle timeouts to free up resources. My text also notes that this "causes putty to send null ssh packets to the remote." This refers to a setting called "Keepalives."
To stop your SSH connection from dropping, you can set up these "Keepalives." In PuTTY, you go to "Connection" settings and set "Seconds between keepalives" to a value like 30 or 60. This tells PuTTY to send a tiny, harmless packet to the Pi every 30 or 60 seconds, which keeps the connection active and prevents it from timing out. For OpenSSH users, you can add `ServerAliveInterval 60` to your `~/.ssh/config` file or use the `-o ServerAliveInterval=60` option with your `ssh` command. It's a simple fix that makes a big difference, honestly.
Managing SSH Keys for Smoother Access
While passwords work, SSH keys offer a much more secure and convenient way to connect. My text talks about how it wanted to "tell it to use the ssh key in github, and never have to worry about it again," and that's exactly the benefit. Instead of typing a password every time, you use a pair of keys: a private key on your computer and a public key on your Raspberry Pi. The public key can be shared widely, but your private key must be kept secret, like your toothbrush, you know?
Generating SSH keys is straightforward. On Linux or macOS, you use the `ssh-keygen` command. This creates two files, typically `id_rsa` (your private key) and `id_rsa.pub` (your public key). Once you have your public key, you copy it to your Raspberry Pi using a command like `ssh-copy-id pi@your_pi_ip`. This adds your public key to the Pi's authorized keys file, allowing your computer to connect without a password, which is pretty neat. My text also mentions "Add identity using keychain," which is a good idea for persisting your keys so you don't have to load them every time.
Using SSH keys is a big step up in security and convenience. It prevents brute-force attacks on your password and makes connecting much faster. It's especially useful for automating tasks or for projects like that Git repository my text mentions, where you want to "create a bare clone on another machine" and avoid constantly entering credentials. You can learn more about SSH keys and their uses, as they are a fundamental part of secure remote access.
X11 Forwarding Tips for Graphical Needs
Sometimes, you might want to run a graphical application on your Raspberry Pi and see its window on your desktop computer. This is where X11 forwarding comes in handy. My text notes, "If you run ssh and display is not set, it means ssh is not forwarding the x11 connection." This happens when your SSH client isn't set up to send those graphical instructions.
To enable X11 forwarding, you typically use the `-X` option with your SSH command (e.g., `ssh -X pi@your_pi_ip`). For PuTTY, there's a setting under "SSH" -> "X11" to enable X11 forwarding. You'll also need an X server program running on your Windows machine, like VcXsrv or Xming. My text says, "To confirm that ssh is forwarding x11, check for a line containing requesting x11 forwarding in" the verbose output of your SSH connection. If you see that line, it means your connection is ready to display graphical programs, which is rather cool for certain projects.
This feature is really useful for debugging graphical interfaces on your Pi or for using applications that don't have a command-line equivalent. It lets you interact with your Pi's graphical environment as if it were right there on your desk, which is a very powerful capability for IoT development.
Troubleshooting Common SSH Hiccups
Even with all the right steps, you might run into a few bumps along the way when trying to connect via SSH. It's just part of working with technology, you know? One common message you might see is "Permission denied." This usually means you're using the wrong username or password, or your SSH key isn't set up correctly on the Pi. Double-check your credentials and make sure your public key is indeed in the `~/.ssh/authorized_keys` file on your Raspberry Pi. It's a simple thing, but it happens quite often.
Another message could be "Connection refused." This often points to the SSH service not running on your Raspberry Pi, or a firewall blocking the connection. Make sure SSH is enabled on the Pi and that your network isn't preventing connections on port 22. Sometimes, a quick reboot of the Pi can also sort things out, as a matter of fact. Also, if you get a warning about the "ECDSA host key" differing, as my text mentioned, it means the server's unique fingerprint has changed. This could be innocent (like you reinstalled the Pi's OS), or it could be a sign of something more serious. If you're sure it's innocent, you can remove the old key from your computer's `known_hosts` file, but always be careful when doing this.
If you're having trouble with Git constantly asking for your username and password, as my text describes, even after setting up SSH keys, it might be that Git is still trying to use HTTPS instead of SSH for your repository. Make sure your Git remote URL starts with `git@github.com:` (for GitHub) instead of `https://`. You can change this with `git remote set-url origin git@github.com:youruser/yourrepo.git`. This little tweak can save you a lot of typing, honestly, and it makes your Git workflow much smoother, which is very helpful.
Frequently Asked Questions
How do I enable SSH on Raspberry Pi for remote access?
You can enable SSH on your Raspberry Pi through its configuration settings, either via the graphical desktop interface under "Preferences" and then "Raspberry Pi Configuration," where you'll find an "Interfaces" tab to tick the SSH box. Alternatively, if you're setting up a fresh system without a screen, you can place an empty file named `ssh` (no file extension) directly into the boot directory of your Raspberry Pi's SD card before you first start it up. The Pi will then automatically enable the SSH service upon booting, which is a pretty handy trick for headless setups.
What software do I need to connect to my Raspberry Pi remotely?
To connect to your Raspberry Pi from another computer, you'll need an SSH client. If you're using Windows, PuTTY is a very popular and reliable choice that you can download from its official website. For users on Linux or macOS, an SSH client, typically OpenSSH, is usually already installed and ready to use directly from your terminal application. These clients act as your secure communication bridge, allowing you to send commands and manage your Pi from afar, which is rather convenient.
Why does my SSH connection to Raspberry Pi keep disconnecting?
SSH connections often disconnect after a period of inactivity due to network timeouts, a common setting on many servers to free up resources. This can be quite annoying, you know, especially if you're just monitoring something. To prevent this, you can configure your SSH client to send "keepalive" packets. In PuTTY, you'll find a "Seconds between keepalives" setting under "Connection" that you can set to a value like 30 or 60. For OpenSSH on Linux or macOS, adding `ServerAliveInterval 60` to your `~/.ssh/config` file, or using it as a command-line option, will achieve the same effect, keeping your session active even when you're not typing.
Wrapping Things Up
Getting your SSH remote IoT Raspberry Pi download and setup working is a truly useful skill for anyone playing with small computers and smart devices. We've talked about how SSH creates a secure pathway, which is pretty much essential for keeping your projects safe from prying eyes. We also covered getting your Raspberry Pi ready, finding and downloading the right SSH tools like PuTTY or using your built-in OpenSSH, and then making that first connection. It's a bit like learning a new language, but once you get the basics, it really opens up possibilities.
We even touched on some common little frustrations, like connections dropping or Git asking for passwords too often, and how to smooth those out with things like keepalives and SSH keys. These small adjustments can make a big difference in your daily workflow, making things much more pleasant, you know? Remember, the goal is to have easy, secure access to your Pi so you can manage your IoT creations without any fuss, no matter where you are. So, keep experimenting and building!
Related Resources:
Detail Author:
- Name : Chester Kling
- Username : laurianne.hyatt
- Email : lavada.strosin@sawayn.com
- Birthdate : 1985-11-22
- Address : 6111 Yolanda Vista Bernhardport, MI 80470-2056
- Phone : 1-629-561-4623
- Company : Stokes, Kovacek and Kub
- Job : Law Enforcement Teacher
- Bio : Voluptatem quia veritatis totam. Consequuntur perferendis sed neque illo dolor ullam labore. Magni nihil est modi sunt. Cum a ut dolores molestias ipsam veniam atque. Incidunt dolorum ut qui non.
Socials
tiktok:
- url : https://tiktok.com/@darien3966
- username : darien3966
- bio : Sit est autem reiciendis voluptatibus.
- followers : 6996
- following : 2142
twitter:
- url : https://twitter.com/dietrichd
- username : dietrichd
- bio : Asperiores et nihil at et. Blanditiis velit in non est pariatur. Qui dolorem non nulla. Quis sequi dolor atque dolorem.
- followers : 315
- following : 1956
instagram:
- url : https://instagram.com/darien_dietrich
- username : darien_dietrich
- bio : Delectus non voluptatem rerum corrupti. Voluptates architecto doloribus quaerat quae.
- followers : 3855
- following : 2037
facebook:
- url : https://facebook.com/ddietrich
- username : ddietrich
- bio : Voluptate porro neque eum magnam.
- followers : 4380
- following : 701
linkedin:
- url : https://linkedin.com/in/darien6548
- username : darien6548
- bio : Nemo error at iste rem aut eum.
- followers : 4308
- following : 2708
