Many people wonder how to keep their smart gadgets secure, especially when those devices are out there on the internet. It can feel a bit much to figure out how to access them safely without paying for special services. This is where using SSH, or Secure Shell, for your IoT devices comes into play, and the really good news is that you can do it for free. You might be surprised by just how much control and safety this method gives you, and it is a popular way to handle things.
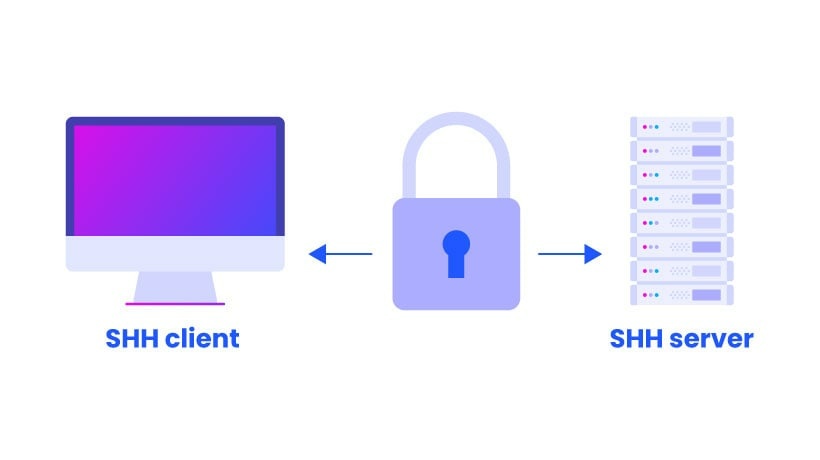
You see, getting into your IoT devices remotely, perhaps to check on something or make a quick change, needs a safe pathway. Using something like SSH means your connection is scrambled, making it much harder for unwanted eyes to peek at what you are doing. It is, in a way, like having a secret handshake that only your device and your computer know.
This guide will walk you through how to use SSH to keep your internet-connected things secure, all without any cost. We will look at common questions and give you some simple ways to make sure your setup works well, perhaps even if you are just starting out with this sort of thing.
Table of Contents
- What is SSH for IoT Devices?
- Why Use SSH for Your IoT Devices?
- Getting Started with Free SSH on IoT
- Creating and Managing Your SSH Keys
- Setting Up Key-Based Authentication
- Making Connections Stick with Keychain
- Common SSH Challenges and Simple Fixes
- Dealing with Idle Sessions
- Handling Host Key Warnings
- Troubleshooting X11 Forwarding
- Fixing Connection Closed Issues
- Using SSH for Git and Other Tools
- Frequently Asked Questions About SSH IoT Devices Free
- Final Thoughts on Securing Your IoT with SSH
What is SSH for IoT Devices?
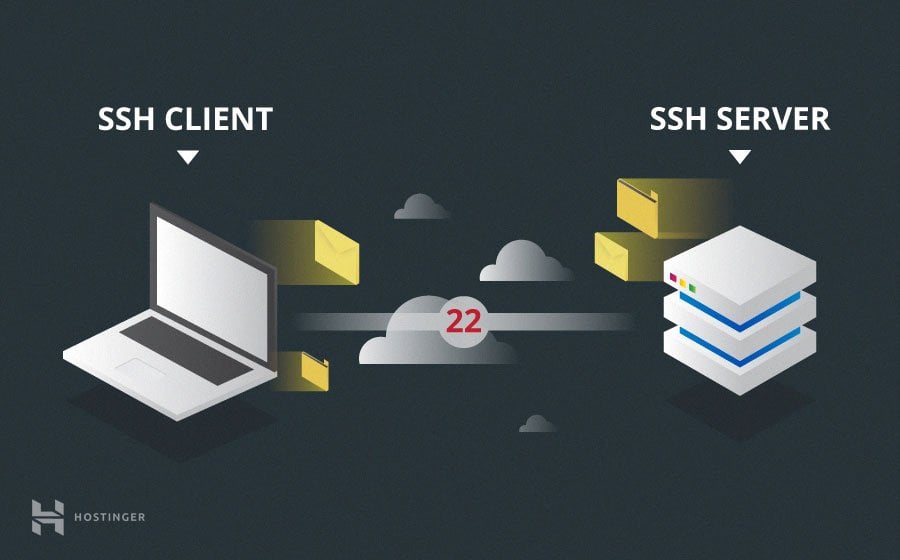
SSH, which stands for Secure Shell, is a way to get into a computer or a device that is far away. It helps you do this over a network that might not be safe, like the open internet, by making sure everything you send and receive is kept secret. This means your commands and any information going back and forth stay private, so, it is very helpful.
For IoT devices, which are often small computers like a Raspberry Pi or other smart home gadgets, SSH is a really important tool. It lets you manage these devices from your main computer, wherever you happen to be. You can update their software, change settings, or even run programs on them, all through a safe connection.
The best part about using SSH for your IoT devices is that the basic tools and methods are available without any cost. This makes it a great option for people who want to keep their smart things safe but also need to stick to a budget, or perhaps just enjoy using free and open solutions.
- Emily Deschanel Prise De Poids
- Brigitte Macron Young Pictures
- Helene Sy
- Securely Connect Remoteiot P2p Ssh Hacker
- Ssis 641
Why Use SSH for Your IoT Devices?
Keeping your IoT devices safe is a big deal, and that is why SSH is so useful. Many of these small devices might not have strong security features built right in, or they might be set up with simple passwords that are easy to guess. Using SSH adds a very strong layer of safety to them.
When you use SSH, your connection is scrambled from one end to the other. This makes it very hard for someone else to listen in on what you are doing or to try and get control of your device. It is a bit like putting your messages into a secret code that only your device and your computer can understand.
Beyond just safety, SSH makes managing your IoT devices much easier. You do not have to be right next to them to make changes. You can be anywhere with an internet connection, and still have full control. This is really handy for devices that are in hard-to-reach spots or spread out across different places, you know.
Also, it helps prevent issues like someone trying to add their public key to your system without you knowing, which is paired with an encrypted private key. This keeps things secure and prevents unwanted access, which is something you definitely want for your gadgets.
Getting Started with Free SSH on IoT
Setting up SSH for your IoT devices does not need any special software you have to pay for. Most operating systems, like Linux, macOS, and even Windows these days, come with the tools you need built right in. This means you can get started pretty quickly, actually.
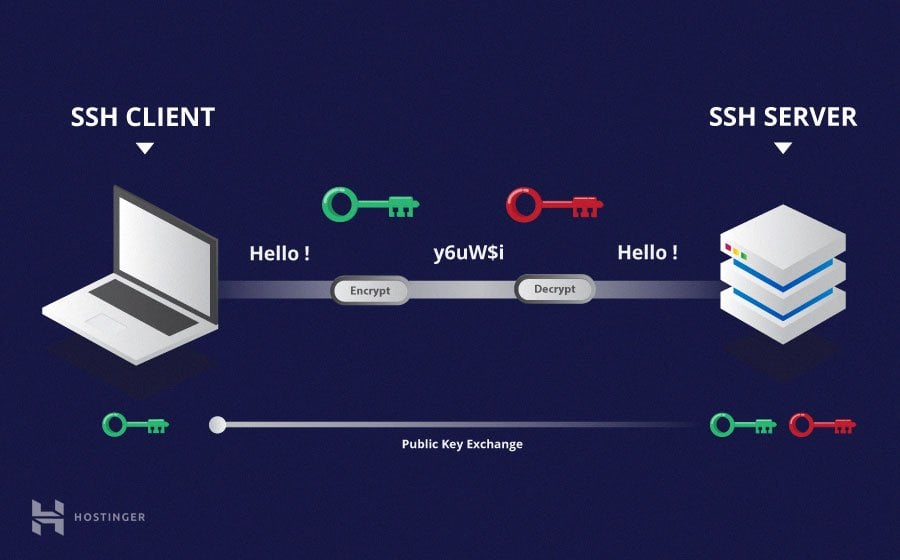
The first thing you will often do is make what are called SSH keys. These keys are a pair: one public, one private. The public key goes on your IoT device, and the private key stays safe on your computer. When you try to connect, these keys talk to each other to prove who you are, making the connection much safer than just using a password.
It is a straightforward process, and once you have it set up, you will find it much simpler to get into your devices without constantly typing in a password. This approach is widely used because it is both secure and convenient, so, it is a good thing to learn.
Creating and Managing Your SSH Keys
To begin with SSH, you will want to make a pair of keys. This is usually done with a command in your computer's terminal. You will typically type something like `ssh-keygen`, and then the computer will ask you where to save the key files. This process makes two files: one for your public key and one for your private key.
The private key needs to be kept very safe on your computer, perhaps with a strong passphrase to protect it. The public key, on the other hand, is what you will put on your IoT device. This public key tells the device that your computer is allowed to connect, which is pretty neat.
For example, if you are trying to make a public key for something like Git, the system will ask you to enter a file where you want to save it. This helps keep your keys organized and easy to find later, which is helpful.
Setting Up Key-Based Authentication
Once you have your keys, the next step is to put your public key onto your IoT device. This is often done by copying the public key file to a special spot on the device, usually in a folder called `.ssh` within the user's home directory. This tells the device to trust connections coming from your computer that use that specific key.
This method means you will not have to type a password every time you want to connect. For instance, if you are doing a `git pull` from the command line and it always asks for your GitHub username and password, you can tell it to use your SSH key instead. This way, you will not have to worry about typing those details again, which is a real time-saver.
It is much more secure than passwords, too. A password can be guessed or stolen, but an SSH key pair is much harder to break. This is why many people prefer this method for their remote access needs, and it is a very good security practice.
Making Connections Stick with Keychain
Sometimes, after you set up your SSH keys, you might find that you still have to enter your passphrase every time you open a new terminal session or try to connect. This can get a bit tiresome, to be honest. This is where tools like Keychain come in handy, or similar agents that manage your SSH keys.
Keychain, as some people point out, helps you keep your SSH identity active. It stores your private key's passphrase in memory, so you only have to type it once when you first start your computer or session. After that, your SSH connections will just work without asking you again.
This makes working with your IoT devices, or even doing things like `git pull origin master`, much smoother. It persists the identity, meaning you are ready to connect without interruptions, which is quite convenient.
Common SSH Challenges and Simple Fixes
Even with a good setup, you might run into a few bumps along the way when using SSH. These issues are usually easy to fix once you know what is going on. It is a bit like learning any new skill; there are always little things that pop up, you know.
For example, a common issue is when a connection just drops. Or perhaps you see a warning about a host key. Knowing what these messages mean can save you a lot of trouble and help you get back to what you were doing quickly.
We will go through some of these common problems and give you straightforward ways to sort them out, so you can keep your SSH connections running smoothly for your IoT devices.
Dealing with Idle Sessions
You might notice that if you leave an SSH session open but do not do anything for a while, it disconnects. This often happens because the server you are connected to has a setting that closes idle connections after a certain amount of time. It is a common thing, actually.
For tools like PuTTY, this causes PuTTY to send small, empty SSH packets to the remote host. These little packets tell the server that you are still there, even if you are not typing anything. This keeps the connection alive and stops it from timing out, which is quite useful.
You can usually change a setting in your SSH client to send these "keep-alive" messages regularly. This helps maintain a steady connection to your IoT device, even when you are not actively using it, which is good for continuous monitoring.
Handling Host Key Warnings
Sometimes, when you try to connect to a server or an IoT device with SSH, you might see a warning that says something like "The ECDSA host key for 'myserver' differs from the key for the..." This means the device's unique identifier has changed from what your computer remembers.
This can happen for a few reasons. Maybe the IoT device was reset, or its operating system was reinstalled, giving it a new host key. It could also mean someone is trying to pretend to be your device, which is a security risk.
If you know the change is legitimate, you will need to remove the old key from your computer's `known_hosts` file. The warning message usually tells you which line to remove. If you are unsure, it is best to be cautious and check why the key changed before accepting the new one, as a matter of fact.
Troubleshooting X11 Forwarding
If you are trying to run graphical applications from your IoT device on your computer, you will need X11 forwarding. This lets the display of the remote program show up on your local screen. If you run SSH and your display is not set, it means SSH is not forwarding the X11 connection.
To confirm that SSH is forwarding X11, you can check for a line containing "requesting X11 forwarding" in the output when you connect. If it is not there, you might need to enable it in your SSH client settings or by using a specific flag, like `-X` or `-Y`, when you type your SSH command.
Sometimes, it also means you need an X server program running on your local computer to receive the graphical output. Getting this right lets you use graphical tools on your IoT device from afar, which is very handy for some projects.
Fixing Connection Closed Issues
It can be quite frustrating when you try to log into your remote server or IoT device using the SSH command, and you get an error like "Connection closed by {ip_address}". This means the device you are trying to connect to ended the connection before you could even get in.
This can happen for a few reasons. Perhaps the SSH service on the IoT device is not running, or there is a firewall blocking the connection. It could also be that the device is out of memory or has too many connections already.
You might need to check the device's logs, if you can access them, to see why it closed the connection. Sometimes, just restarting the SSH service on the device, or making sure the device has enough resources, can fix the problem. Remote SSH login password would be enough in this case for initial access, if you have it.
I had this issue after I changed my Apple ID password, so I updated my Apple ID and restarted my Mac, and that helped. Sometimes, a simple restart of related services or your computer can clear up these kinds of connection problems, you know.
Using SSH for Git and Other Tools
SSH is not just for logging into your IoT devices; it is also widely used for other tasks, like working with Git repositories. If you have a project and you created a Git repository, you might want to create a bare clone on another machine, perhaps an IoT device acting as a small server.
Using SSH with Git means you can push and pull code without having to type your username and password every single time. This is a huge convenience, especially if you are doing a lot of development work on or with your IoT devices. It is very efficient.
For example, if you are trying to access a server using FileZilla and were told you needed to use authentication with public/private keys, SSH keys are exactly what they mean. You can create these keys using the terminal, and then tell FileZilla to use them for secure file transfers.
The documentation is not always clear on how to explicitly use only that key, but generally, you point your Git client or FileZilla to the private key file. This makes sure your code transfers are safe and smooth, which is important for any project. You can learn more about connecting Git with SSH on other sites.
Frequently Asked Questions About SSH IoT Devices Free
How do I SSH into an IoT device?
To get into an IoT device using SSH, you first need to make sure the SSH service is running on the device itself. Then, from your computer, you open a terminal or command prompt. You will use the `ssh` command, followed by the username on the device and its IP address, like `ssh username@ip_address`. If you have set up SSH keys, it will try to use those for access. If not, it might ask for a password.
Is SSH free to use?
Yes, the basic SSH tools and protocol are completely free to use. The software needed to run an SSH server on your IoT device, and the client software on your computer, are typically open-source and available without cost. This makes it a very budget-friendly way to secure your remote connections.
Can I use SSH without a password?
Absolutely! Using SSH without a password is not only possible but also a recommended security practice. You do this by setting up SSH key-based authentication. Instead of typing a password, your computer uses a private key to prove its identity to the IoT device, which has your matching public key. This makes connections quicker and more secure.
Final Thoughts on Securing Your IoT with SSH
Using SSH for your IoT devices is a smart way to keep them safe and easily managed, and it is almost always free to set up. It gives you a strong, encrypted connection, which is really important for any device connected to the internet. This helps protect your data and control your gadgets from anywhere.
By taking the time to set up key-based authentication and understanding some common issues, you can make your remote access experience much smoother. It is about having peace of mind that your smart things are secure, and you can always get to them when you need to, which is a great feeling.
If you want to learn more about secure connections on our site, or link to this page for more details, we have other resources available for you.
Related Resources:
Detail Author:
- Name : Halie Pouros
- Username : zula21
- Email : pietro94@yahoo.com
- Birthdate : 1973-11-27
- Address : 2328 Beier Shores Crookschester, AL 13162
- Phone : +1-970-204-9543
- Company : Cole Ltd
- Job : Biological Technician
- Bio : Id officia et et et quia. Quisquam voluptatem neque sint quam impedit rem. Sed esse natus architecto.
Socials
instagram:
- url : https://instagram.com/ehowell
- username : ehowell
- bio : Sit ut accusantium sed dolor odit. Qui sunt quam nihil aliquam dolores saepe ut.
- followers : 2847
- following : 1935
tiktok:
- url : https://tiktok.com/@ernie5407
- username : ernie5407
- bio : Quia est assumenda enim molestias ut est optio. Cum quod aliquid dolorum.
- followers : 6997
- following : 2448
