Have you ever wanted to reach your small smart devices, like a Raspberry Pi or an Arduino with Wi-Fi, even when you're not at home? It feels pretty good to have control over your gadgets, doesn't it? Many folks think getting remote access means paying for special services or dealing with tricky setups. Yet, that's not always the case, you know. This article will show you how to use SSH for your IoT devices without spending a penny, giving you a secure way to manage them from a distance.
You might have run into some bumps trying to get things connected. Perhaps you've seen messages like "Connection closed by {ip_address}" when trying to log in, or maybe you've had trouble getting your graphical applications to show up because "display is not set." It can be a bit frustrating, I mean, when you just want to check on your project or make a quick change. Some people even struggle with finding the special keys they made for secure logins, which is a common puzzle, actually.
This guide aims to make things much clearer. We'll walk through what SSH is, why it's a fantastic choice for your smart devices, and how to set it all up. We'll also touch on some common issues, like getting your login keys to stick around, or figuring out why your connection might close unexpectedly. By the end, you'll have a good idea of how to keep an eye on your devices and work with them from just about anywhere, giving you a lot more freedom with your home tech, so it's almost like magic.
Table of Contents
- Why Free SSH for Your IoT Devices?
- What SSH Is and How It Works for IoT
- Getting Your IoT Device Ready for SSH
- Keeping Your IoT SSH Connection Safe
- Solving Common SSH Problems with IoT
- Practical Examples: Using SSH with IoT Devices
- FAQ About SSH IoT Device Free
- Final Thoughts on SSH IoT Device Free
Why Free SSH for Your IoT Devices?
The Appeal of No-Cost Access
For anyone working with smart home gadgets or small single-board computers, the idea of getting remote access without extra charges is very appealing. Many solutions out there ask for monthly fees or come with complicated setups that might need special hardware. Yet, SSH, which stands for Secure Shell, provides a built-in, widely available way to connect to your devices. It’s pretty much a standard tool for anyone who manages servers, and it works just as well for your little IoT friends, giving you a lot of flexibility.
More Than Just Cost Savings
Beyond saving money, using SSH gives you a lot of control over your devices. You can run commands, transfer files, and even set up tunnels for other services. This means you are not limited by what a specific app or service allows you to do. It's like having direct access to your device's brain, which is very useful for custom projects or for troubleshooting when something goes wrong. So, it's not just about being free; it's about gaining full command over your personal tech, too.
What SSH Is and How It Works for IoT
A Quick Look at SSH Basics
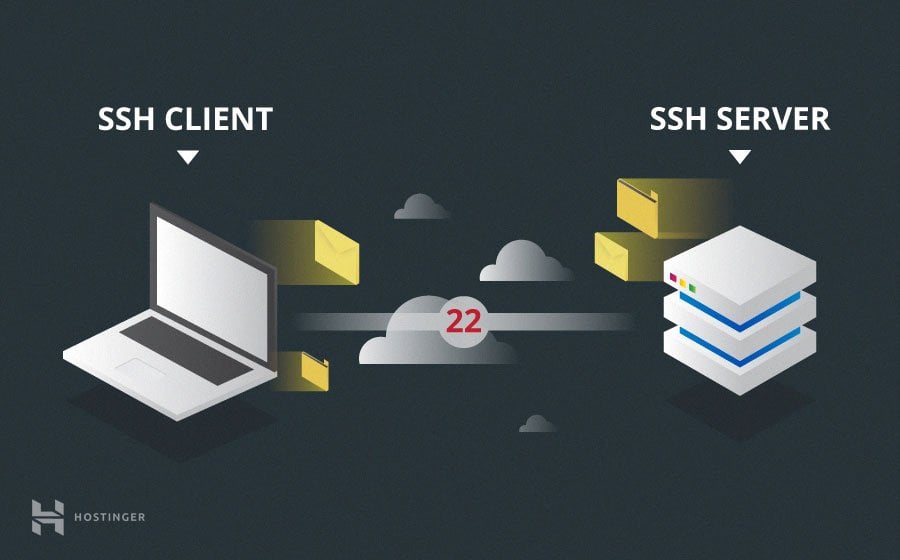
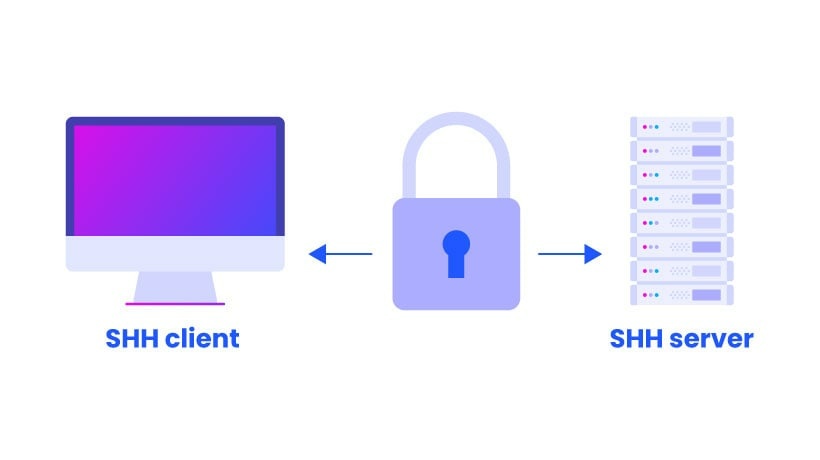
SSH is a network protocol that lets you operate network services securely over an unsecured network. It provides a secure channel over an unsecured network by using a client-server architecture, connecting an SSH client application with an SSH server. When you type something like ssh root@{ip_address} into your terminal, you are asking your computer, the client, to talk to the SSH server on your remote device. This connection is encrypted, which means what you send and receive is scrambled, keeping your data private from prying eyes, which is quite important for security, actually.
- What Happened To Paul Hebert Wicked Tuna
- Marshawn Lynch Wife
- Mckinley Richardson Only Fans
- Lacey Fletcher
- Mckinzie Valdez Sex
Public and Private Keys: Your Digital Handshake
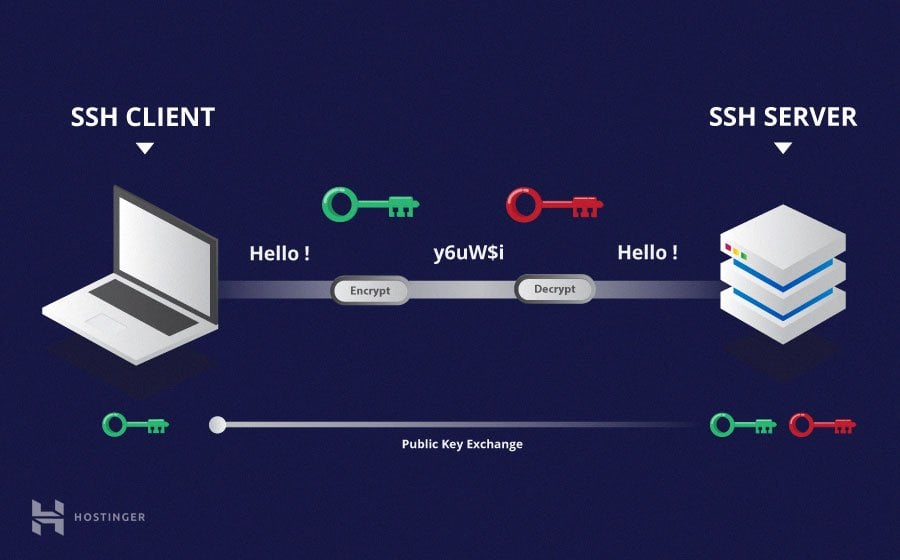
A very common way to log in with SSH, especially for IoT devices, is by using public and private keys. It's a bit like having a special lock and key. You keep the private key secret on your computer, and you put the public key on your IoT device. When you try to connect, the device uses your public key to check if your private key is the right one. This is much safer than just using a password, especially a simple one. I mean, some folks, like those trying to access a server using FileZilla, are told they need this kind of authentication, and it's a good practice for your small devices too, you know.
When you generate these keys, you might be asked, "Enter file in which to save the." This is where your keys will live. The public key is usually a file ending in .pub. The private key is the other file, which you should guard carefully. This system helps prevent adding your public key without the paired, encrypted private key, making things more secure, which is pretty good.
Handling Graphical Applications with X11
Sometimes, you might want to run a graphical program on your IoT device and see its window on your computer. This is where X11 forwarding comes in. If you run SSH and your display is not set, it often means SSH is not forwarding the X11 connection. To confirm that SSH is forwarding X11, you can look for a line containing "requesting X11 forwarding" in your SSH output. It's a useful feature, but it does need to be set up correctly on both ends, so it's something to keep in mind.
Getting Your IoT Device Ready for SSH
Basic Setup Steps
To get your IoT device ready for SSH, you usually need to make sure an SSH server program is running on it. For many Linux-based IoT devices, like a Raspberry Pi, this often means installing a package called openssh-server. Once installed, you might need to enable it to start automatically when the device boots up. After that, you can usually connect using a password at first, like ssh username@{ip_address}. Remember, remote SSH login password would be enough in this case for an initial setup, but we'll talk about better security later, that is.
Generating and Managing Your Keys
Making your public and private keys is pretty straightforward. You typically use a command like ssh-keygen on your computer. This command will ask you where to save the keys and if you want a passphrase for your private key. A passphrase is a good idea, as it adds an extra layer of protection to your private key. After you create them, you then copy your public key to your IoT device. There's a command called ssh-copy-id that makes this part quite simple, which is nice.
Making Keys Stick Around with a Keychain
You might find that after you restart your computer, your SSH keys aren't automatically available, and you have to type your passphrase again. This can be a bit annoying, I mean, especially if you connect often. As some folks point out, you can add your identity using a keychain program to make it persist. This way, your system remembers your private key and its passphrase, so you don't have to enter it every time you connect. It just makes things smoother for regular use, you know.
Keeping Your IoT SSH Connection Safe
Strong Passwords and Key Security
Even though we're focusing on free SSH, security is still very important. If you use a password for SSH, make sure it's a very strong one. That means long, with a mix of different characters. However, using public/private keys is generally much safer. If you use keys, always protect your private key. Never share it, and if you can, give it a strong passphrase. This passphrase protects your private key even if someone gets a hold of the file itself, which is pretty clever, really.
Disabling Root Login for Better Protection
On many Linux systems, the 'root' user has complete control. Allowing direct SSH login as root is generally not a good idea because it's a common target for attacks. It's much safer to create a regular user account on your IoT device, log in as that user, and then use a command like sudo to perform tasks that need root privileges. This adds an extra step for anyone trying to get full control, making your device a little harder to break into, you know.
Solving Common SSH Problems with IoT
When Your Connection Closes Unexpectedly
It's quite common to get an error like "Connection closed by {ip_address}" when trying to SSH into a remote server or your IoT device. This can happen for several reasons. It might be that the SSH server isn't running on the device, or perhaps a firewall is blocking the connection. Sometimes, it's just a simple network issue, like the device not being on the same network, or its IP address changed. Checking the device's status and your network settings is usually the first step when you see this message, that is.
Trouble with X11 Forwarding
As mentioned, if you're trying to run a graphical application and get a message that your display is not set, it points to an X11 forwarding issue. To fix this, you need to make sure X11 forwarding is enabled on both your client computer and the SSH server on your IoT device. On the client side, you might use the -X option with your SSH command, like ssh -X user@{ip_address}. On the server, you'll need to check the SSH server's configuration file, typically /etc/ssh/sshd_config, to make sure X11Forwarding yes is set. After changing the server config, you'll need to restart the SSH service on the IoT device for the changes to take effect, which is pretty standard.
Finding Your Keys
After creating your public and private keys, you might wonder where they went. By default, ssh-keygen saves them in a hidden folder inside your home directory, usually ~/.ssh/. The private key is often named id_rsa (or id_ed25519, etc.) and the public key will have the same name but with a .pub extension, like id_rsa.pub. If you chose a different name when you generated them, you'll need to remember that name. Checking this hidden folder is the first place to look if you can't find them on your system, you know.
When Your Identity Needs to Persist
If you're tired of typing your passphrase every time you use your SSH key, adding your identity to your system's keychain is the answer. On macOS, this is often handled automatically or through system preferences. For Linux, you might use ssh-add and then configure your shell to use ssh-agent. This way, the passphrase is remembered for your current session, and with some setup, it can even persist across reboots, which is very convenient, honestly. It makes the whole process much smoother, especially when you're doing a lot of work with your devices.
Practical Examples: Using SSH with IoT Devices
Let's say you have a Raspberry Pi running your home automation system. With SSH, you can connect to it from your laptop anywhere with an internet connection. You could, for instance, check the logs if something isn't working right, or update the software on the Pi without having to plug in a monitor and keyboard. If you're using Git for your projects, you might also be trying to generate a public key for your Git setup, which is very similar to setting up SSH for direct access to your device. You can even use SSH to securely transfer files to and from your device, perhaps to upload new code or download data collected by sensors. It gives you a direct line to your device's core functions, which is really powerful.
For instance, if you're experiencing issues after a password change, similar to how someone might update their Apple ID and restart their Mac, you can use SSH to check if your device's network settings or SSH configuration were affected. Sometimes, a simple restart of the SSH service on the device can clear up connection problems. You can use SSH to do this remotely, which saves you a trip to the device itself. You can also evaluate commands in the context of the current shell, as if entered directly, giving you full control, so it's quite flexible.
To learn more about OpenSSH, which is the most common SSH implementation, you can visit their official site. It's a great resource for detailed information. You can also Learn more about on our site, and link to this page for related topics. These resources can help you deepen your understanding of secure remote access for your smart devices.
FAQ About SSH IoT Device Free
Can I really use SSH for my IoT devices without paying anything?
Yes, you absolutely can. SSH itself is an open-source protocol, and the software used to run SSH servers and clients, like OpenSSH, is free to use. You won't need to pay for any subscriptions or special licenses to get basic remote access to your IoT devices using SSH, which is a big plus, you know.
Is using SSH for my IoT devices safe?
When set up correctly, SSH provides a very secure way to connect to your devices. It uses strong encryption to protect your data during transfer. Using key-based authentication instead of just passwords, and disabling direct root login, makes it even safer. It's much more secure than many other remote access methods, that is.
What kind of IoT devices can I use SSH with?
You can use SSH with pretty much any IoT device that runs a Linux-based operating system or has enough processing power and memory to run an SSH server. Common examples include Raspberry Pi boards, BeagleBone Black, Orange Pi, and many other single-board computers. Some more advanced microcontrollers with Wi-Fi capabilities can also be configured for SSH access, which is very versatile, actually.
Final Thoughts on SSH IoT Device Free
Getting your IoT devices to communicate with you from afar, without any extra cost, is a truly empowering thing. SSH offers a secure and flexible way to do just that. By taking the time to set up key-based authentication and understanding how to troubleshoot common issues, you gain a lot of control over your smart projects. It's a skill that pays off in convenience and peace of mind, letting you manage your devices whether you're across the room or across the country. So, give it a try and see how much easier it makes your life with smart gadgets.
Related Resources:
Detail Author:
- Name : Crystal Quigley
- Username : kenyatta72
- Email : bernadine01@yahoo.com
- Birthdate : 1989-09-14
- Address : 830 Ethyl Burg North Eleanoreburgh, TN 03904
- Phone : 619-392-1734
- Company : Ullrich-Carter
- Job : Photoengraver
- Bio : Dolores distinctio est necessitatibus dolor placeat rerum. Consequatur earum est qui dicta.
Socials
facebook:
- url : https://facebook.com/kennynikolaus
- username : kennynikolaus
- bio : Sit qui sint quis eaque et sit quia.
- followers : 3772
- following : 926
tiktok:
- url : https://tiktok.com/@nikolausk
- username : nikolausk
- bio : Provident nulla sunt et sit ipsum error fuga.
- followers : 5472
- following : 805
