So, you've got a Raspberry Pi, and you're thinking about all the neat things you can make it do around your home or for a project. Perhaps you're building a little smart gadget, or maybe a tiny weather station that sends data to you from the garden. Whatever your idea, there comes a moment when you wish you could talk to your Pi without needing to plug in a screen and keyboard every single time. This is where a very handy tool comes into play, letting you control your tiny computer from another machine, no matter where it is.
That feeling of wanting to reach out and tweak something on your small device, even when it's tucked away in a corner or sitting outside, is that something many people experience. It's a bit like having a remote control for your entire computer, giving you freedom to manage things from your main desktop or even a laptop while you're on the go. This way of communicating is super helpful for keeping your little projects running smoothly and making changes without having to move around a lot of wires.
Basically, getting your Raspberry Pi to listen to your commands from afar means you can set up all sorts of cool internet-connected things, from home automation to monitoring systems. It helps you keep an eye on your small devices and give them instructions, which is really important for anything you want to have working on its own, maybe even for long stretches of time, without constant hands-on adjustments. This ability is a core part of working with these small, connected gadgets.
- Idannyeli Onlyfans
- Mikalafuente Onlyfans
- Valvoline Coupon 50 Off
- Jillian Stacey
- Mckinley Richardson Only Fans
Table of Contents
- What Is SSH for Raspberry Pi IoT Tutorial?
- Getting Your Raspberry Pi Ready for SSH Raspberry Pi IoT Tutorial
- How Do You Connect to Your Raspberry Pi Using SSH Raspberry Pi IoT Tutorial?
- Why Use Keys for SSH Raspberry Pi IoT Tutorial Instead of Passwords?
- What If Your SSH Connection Isn't Working for Raspberry Pi IoT Tutorial?
What Is SSH for Raspberry Pi IoT Tutorial?
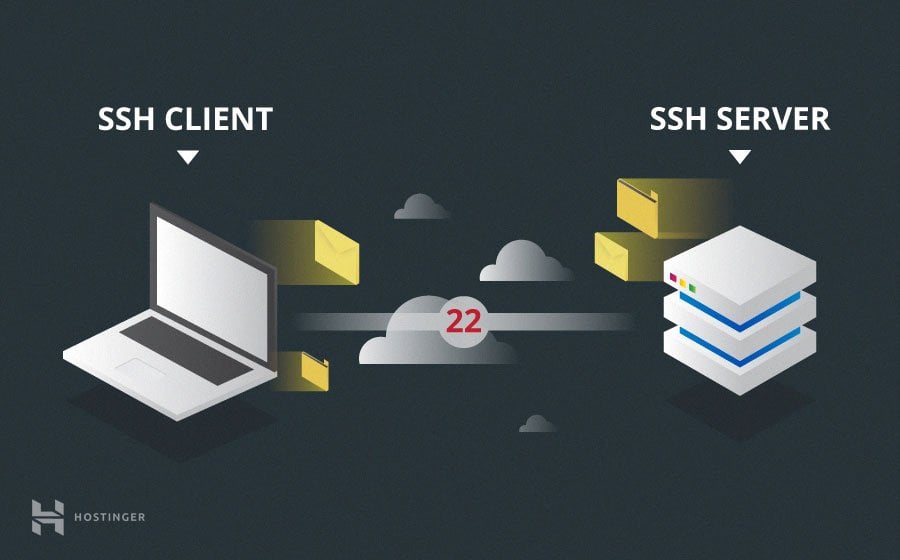
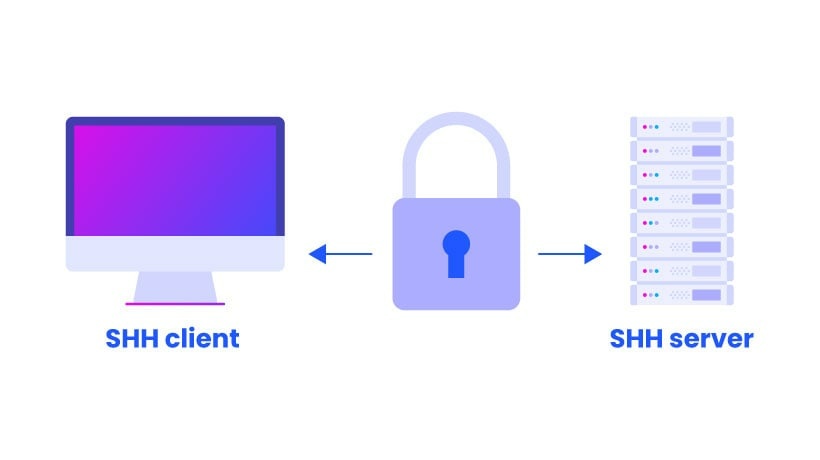
You know, SSH, which stands for Secure Shell, is a way to get into a computer that's not right in front of you, but in a very safe manner. Think of it like a secret, protected tunnel you can use to send commands and receive information from your Raspberry Pi. It means whatever you type, and whatever the Pi sends back, stays private between the two machines. This is really important, especially when you're dealing with things connected to the internet, like in an IoT setup. Without this kind of protection, someone could easily listen in on your conversation with your Pi, which is definitely not what you want when you're trying to keep your smart home devices secure. This method makes sure that when you're working on your Raspberry Pi for an IoT project, your connection is kept safe from prying eyes.
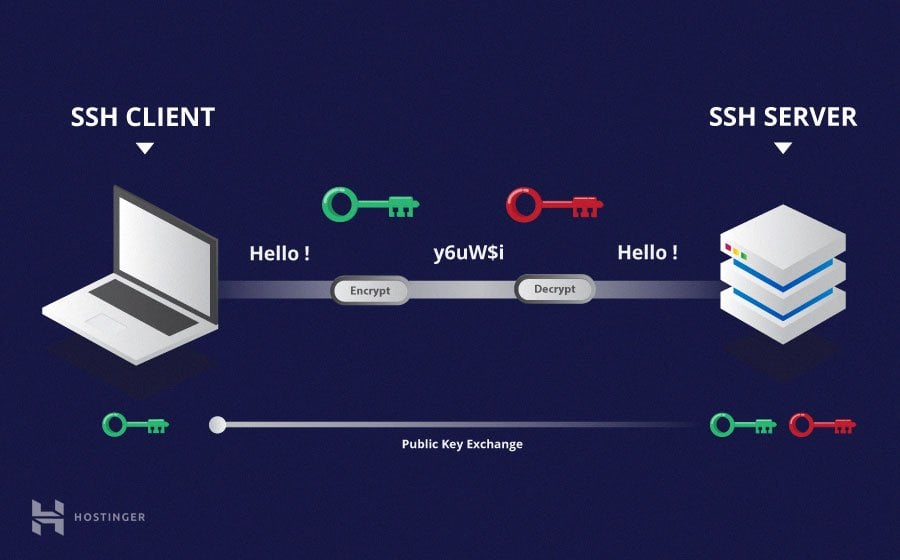
So, too it's almost a kind of digital handshake that confirms both sides are who they say they are before any information starts flowing. This identity check is a big part of why SSH is so widely used for managing remote systems. It helps prevent unauthorized people from getting access to your devices. For your Raspberry Pi, whether it's running a sensor or controlling a light, using SSH means you can manage it from anywhere with an internet connection, and feel good about the safety of that link. It's a simple, yet very strong way to keep your little computer under your control, no matter the distance.
Getting Your Raspberry Pi Ready for SSH Raspberry Pi IoT Tutorial
Before you can start talking to your Raspberry Pi from another computer, you need to make sure the Pi itself is set up to listen. This usually involves a few simple steps when you first get your Pi going. You'll want to have the operating system installed, like Raspberry Pi OS, and then make sure that the special door for SSH connections is open. Sometimes, this door is closed by default for safety reasons, so you have to tell your Pi to open it up. This is usually done through a tool that comes with the operating system, making it pretty straightforward to get your Raspberry Pi ready for this kind of remote access, which is super useful for any IoT tutorial you might follow.
Initial Setup Steps for SSH Raspberry Pi IoT Tutorial
First off, after you've put the operating system onto your memory card and booted up your Raspberry Pi, you'll want to get to its settings. You can do this by typing a specific command into the Pi's own terminal window, or by looking through the graphical interface if you have a screen connected. There's a section there for "Interface Options," and within that, you'll find the choice to enable SSH. You just need to select that, and then confirm you want it turned on. It's really that simple to get the basic listening part working. This initial setup is a very important step for anyone wanting to work through an SSH Raspberry Pi IoT tutorial.
Once you've turned on SSH, it's also a good idea to know your Raspberry Pi's network address. This is like its street address on your home network. You can find this by typing another command into the Pi's terminal. It will show you a series of numbers, usually starting with something like 192.168. This number is what you'll use from your other computer to tell it where to send the commands. Knowing this address is pretty important for making sure your messages go to the right place. Occasionally, people forget to write this down, and then they wonder why their remote connection isn't working, but it's just a matter of knowing the right address to use for your SSH Raspberry Pi IoT tutorial efforts.
How Do You Connect to Your Raspberry Pi Using SSH Raspberry Pi IoT Tutorial?
After your Raspberry Pi is ready to accept connections, the next thing is to actually make that link from your desktop or laptop. You'll typically use a special program on your computer called a "terminal" or "command prompt." This is where you type in the instructions. The basic command you'll use is pretty simple, usually something like `ssh pi@your_pi_address`. The `pi` part is the default username for most Raspberry Pi setups, and `your_pi_address` is that series of numbers you found earlier. When you hit enter, your computer tries to reach out to the Pi. It's kind of like dialing a phone number to talk to your little computer friend, which is a key step in any SSH Raspberry Pi IoT tutorial.
Making the First Connection for SSH Raspberry Pi IoT Tutorial
The very first time you try to connect, your computer might ask you if you're sure you want to connect to this unknown device. This is a safety measure, just making sure you know who you're talking to. You'll usually type "yes" to confirm. After that, it will ask for a password. This is the password for the `pi` user on your Raspberry Pi. Once you type that in correctly, you'll see a new line appear in your terminal, showing that you're now "inside" your Raspberry Pi, ready to type commands directly to it. This is a pretty cool moment, as you've just established a remote connection, making your SSH Raspberry Pi IoT tutorial much more flexible.
Sometimes, people run into a situation where the connection just closes right after they try to log in, or they get an error message about the display not being set. This can be a bit confusing, but it often means something isn't quite right with how the connection is being handled. For instance, if you were trying to open a graphical program from your Pi on your desktop, and the "display" isn't set, it means the connection isn't set up to send those kinds of visual signals. For simple command-line work, you might not need that, but it's something to look out for if things aren't working as expected. These little hiccups are pretty common when you're learning, but they're usually simple to sort out, especially when following an SSH Raspberry Pi IoT tutorial.
Why Use Keys for SSH Raspberry Pi IoT Tutorial Instead of Passwords?
While using a password to get into your Raspberry Pi works, there's a much more secure and convenient way: using something called SSH keys. Think of these keys as a super-strong, unique lock and key set. You have one part of the key, the private one, which stays safely on your computer. The other part, the public one, goes onto your Raspberry Pi. When you try to connect, these two parts talk to each other and prove you are who you say you are, without ever sending your password over the network. This is much safer because even if someone were listening in, they wouldn't get anything useful to break into your Pi. It makes your remote access for your SSH Raspberry Pi IoT tutorial much stronger.
This method of using keys is a lot less prone to certain kinds of attacks than just relying on a password. Passwords can be guessed, or sometimes people use simple ones that are easy to figure out. With keys, the chance of someone guessing your "key" is incredibly small. Plus, once you set it up, you often don't even need to type anything to log in, which is a nice bit of convenience. It's a bit like having a special, unforgeable pass that gets you straight into your device. This adds a really good layer of protection for any remote work you do with your Raspberry Pi, especially for IoT projects where security is pretty important.
Creating and Using SSH Keys for SSH Raspberry Pi IoT Tutorial
To make these special keys, you'll use a command on your main computer. It's a pretty straightforward process, and the computer will ask you a few questions, like where you want to save the keys. Once they're made, you then need to copy the public part of the key over to your Raspberry Pi. There's a specific command for this that makes it simple to transfer the public key to the right spot on your Pi. Once that's done, your Pi knows to expect your special key when you try to connect. This step might seem a little more involved at first, but it pays off in terms of safety and ease of use for your SSH Raspberry Pi IoT tutorial.
Sometimes, people create these keys and then can't seem to find them on their computer, which can be a bit frustrating. Or, they try to add their identity to a system that remembers it, like a "keychain" on a Mac, and it doesn't seem to stick. These issues often come down to where the keys are saved or how the system is set up to remember them. For example, if you're trying to add your key for continuous use, you might need to make sure your system evaluates certain commands in the right way, so it remembers your key identity. This prevents you from having to type your password or key phrase every single time you want to connect, making it much smoother for your SSH Raspberry Pi IoT tutorial.
What If Your SSH Connection Isn't Working for Raspberry Pi IoT Tutorial?
Every now and then, you might hit a snag when trying to connect to your Raspberry Pi. It's something that happens to pretty much everyone. Maybe you get a message saying the connection was closed by the remote machine, or perhaps you can't seem to find the keys you just made. These kinds of things can feel a bit confusing, but they usually have pretty simple explanations. One common reason for a connection closing is that the Raspberry Pi itself isn't set up to accept connections, or maybe the network address you're using isn't quite right. It's a bit like trying to call a phone number that's been disconnected or belongs to someone else. Getting to the bottom of these little issues is a part of learning, and it makes you better at handling your Raspberry Pi for any IoT tutorial you are working on.
If you're having trouble with your connection, a good first step is to double-check the network address of your Raspberry Pi. Make sure it hasn't changed, especially if your Pi gets a new address from your router every so often. Also, confirm that SSH is still enabled on the Pi. Sometimes, a software update or a setting change can turn it off without you realizing it. If you're using keys and having trouble, make sure both parts of the key are in the right places and that your main computer is actually using them. It's worth remembering that these small devices can sometimes be a little particular, but with a bit of patience, you can almost always figure out what's going on and get your SSH Raspberry Pi IoT tutorial back on track.
Related Resources:
Detail Author:
- Name : Prof. Mayra Hermiston
- Username : qkilback
- Email : wwilliamson@yahoo.com
- Birthdate : 1994-04-13
- Address : 817 Senger Harbors Rutherfordfurt, SD 88559-8258
- Phone : 423.461.4450
- Company : Stamm, Kuphal and Collins
- Job : Automotive Technician
- Bio : Consectetur voluptas sint harum ut rem consectetur. Velit possimus ut aut minima reiciendis eos. Consequatur nulla unde et sint perferendis at.
Socials
linkedin:
- url : https://linkedin.com/in/bward
- username : bward
- bio : Suscipit quidem et autem recusandae deserunt.
- followers : 4037
- following : 1125
facebook:
- url : https://facebook.com/breanna1006
- username : breanna1006
- bio : Inventore nam animi doloremque pariatur ut dolor ut molestiae.
- followers : 3609
- following : 2028
tiktok:
- url : https://tiktok.com/@breanna_ward
- username : breanna_ward
- bio : Est velit libero sit sapiente. Id ipsam molestiae doloribus.
- followers : 4469
- following : 290
instagram:
- url : https://instagram.com/breanna_xx
- username : breanna_xx
- bio : Aspernatur rerum maxime culpa quod mollitia provident ratione. Veniam odit quidem velit.
- followers : 384
- following : 2018
twitter:
- url : https://twitter.com/breanna_real
- username : breanna_real
- bio : Eum ut quibusdam maiores ut dicta. Quidem omnis tempora unde vero et iure. Laudantium occaecati esse est.
- followers : 3165
- following : 1043
